Choose your currency for the best shopping experience

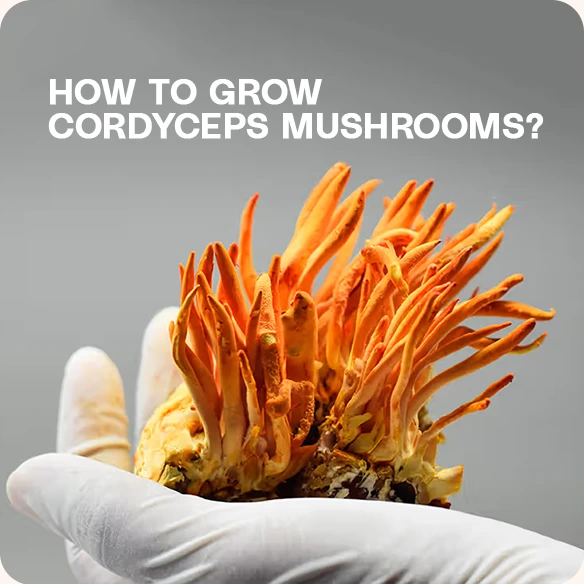
How To Grow Cordyceps Mushrooms?

Growing cordyceps mushrooms might sound complicated, but it’s pretty simple once you know the steps. These mushrooms are popular for their health benefits, and growing them at home can be a fun and rewarding project.

In this guide, we’ll explain everything—from what you need to how to set things up, take care of them, and harvest. Whether you’re just curious or ready to start growing, this will help you figure it out without the confusing stuff. Let’s get started!

What Do You Need to Start Growing Cordyceps Mushrooms?

Cordyceps Mushrooms

You don’t need anything too crazy, just some basic gear and patience. There are two popular ways to grow cordyceps mushrooms: Jar Tech and Bin Tech. Both work great, but they use slightly different tools. Here’s a quick rundown of what you’ll need for each method:

Jar Tech

  • 12 Pint Jars: Your mushrooms will grow right inside these.
  • Poly-fill: Helps with airflow while keeping out contaminants.
  • Pressure Cooker: You’ll use this to sterilize everything—it’s a must.
  • Cordyceps Culture: This is what grows into your mushrooms.
  • Mixing Bowl & Spoon: For prepping your nutrient mix.
  • Scale Scoop: Makes sure you measure things correctly.
  • Gloves, 70% Isopropyl Alcohol, & Paper Towels: These keep your setup clean and your mushrooms healthy.

Bin Tech

  • Plastic Bin: This will act as your grow container.
  • Rice Cooker or Instant Pot: Used to sterilize the nutrient mix.
  • Parafilm: Seals the bin to keep things fresh.
  • Cordyceps Culture: Same deal—you need this to grow anything.
  • Mixing Bowl, Spoon & Scale Scoop: This is for mixing and measuring your ingredients.
  • Gloves, 70% Isopropyl Alcohol, & Paper Towels: Essential for staying clean and avoiding contamination.

Once you’ve got your supplies, you’re ready to start prepping and growing. Both methods are pretty straightforward—just pick the one that works best for you and get started!

What’s the First Step?

Small Cordycceps mushrooms growing

Whether you’re using the jar or bin method, making the broth is your first step. The nutrient broth is what helps your cordyceps mushrooms grow. It’s used to hydrate brown rice, which acts as a substitute for the insect larvae that cordyceps naturally grow on. Here’s how you do it:

Ingredients You’ll Need

  • 1 gallon of coconut water
  • 10 grams of tapioca starch
  • 5 grams of magnesium sulfate
  • 10 grams of multivitamins (crushed)
  • 19 grams of nutritional yeast or soy peptone
  • 11 grams of kelp powder
  • 3.5 grams of gypsum

Step-by-Step Instructions

  1. Combine the Dry Ingredients: Grab a mixing bowl and add the tapioca starch, magnesium sulfate, kelp powder, crushed multivitamins, nutritional yeast (or soy peptone), and gypsum.
  2. Add the Coconut Water: Slowly pour the coconut water into the bowl while stirring to make sure everything dissolves evenly.
  3. Mix Thoroughly: Stir until there are no clumps and the mixture is smooth and consistent.
  4. Store Extra Broth: If you make more than you need, pour the leftover broth into a clean container and pop it in the fridge. It’ll stay good for up to a week.

Once your nutrient broth is ready, you can use it to hydrate the brown rice and prep your jars or bins for inoculation. It’s simple, and this step sets the foundation for growing healthy cordyceps mushrooms!

Jar Tech Method

Jar full with Cordyceps Mushrooms

How To Hydrate the Brown Rice for Jar Tech?

Hydrating the brown rice with your nutrient broth is a key step to getting your jars ready for growing Cordyceps. The rice acts as the growing surface (or substrate) for the mushroom mycelium. Here’s how you do it:

  1. Measure the Rice: For each jar, measure out enough brown rice to fill about 75% of the jar once it’s hydrated. This gives the mushrooms room to grow.
  2. Add the Nutrient Broth: Slowly pour your nutrient broth over the rice in a mixing bowl. Use enough to fully coat the rice without leaving extra liquid pooling at the bottom.
  3. Mix Thoroughly: Stir the rice and broth together until every grain is evenly hydrated. The goal is to get a slightly damp consistency—not soggy.
  4. Fill the Jars: Spoon the hydrated rice into your jars, filling them about 75% of the way. This leaves room for air circulation and mushroom growth.
  5. Seal the Jars: Cover the jars with breathable lids (like poly-fill or micropore tape) to prevent contamination while allowing airflow.

Once your rice is prepped and in the jars, they’re ready for sterilization in a pressure cooker. This step ensures a clean and nutrient-rich environment for your cordyceps to thrive!

How To Sterilize Jars for Cordyceps Cultivation?

Sterilizing your jars is super important because it kills any bacteria or mold that could ruin your growth. If you’ve never used a pressure cooker before, don’t worry—it’s pretty straightforward. Here’s how to do it step by step:

  1. Prep Your Jars: Make sure your jars are filled with hydrated brown rice and sealed with breathable lids (with poly-fill or micropore tape). Don’t overtighten the lids—you want them snug but not too tight.
  2. Add Water to the Pressure Cooker: Pour about 1–2 inches of water into the bottom of your pressure cooker. Use a rack or trivet to keep the jars above the water so they don’t tip over or get wet.
  3. Load the Jars: Carefully place your jars inside the pressure cooker. Make sure they’re not touching each other too much—leave some space for steam to circulate.
  4. Seal the Pressure Cooker: Close the lid of your pressure cooker and make sure it’s sealed properly. Double-check that the vent is closed.
  5. Build Up Pressure: Turn on the heat and let the pressure cooker build up to 15 PSI. This is the sweet spot for sterilization. Depending on your cooker, it might take a few minutes to get there.
  6. Sterilize the Jars: Once you hit 15 PSI, set a timer for 90 minutes. This ensures everything inside the jars gets properly sterilized.
  7. Cool Down: When the timer goes off, turn off the heat and let the pressure cooker cool down naturally. Don’t try to open it or release the pressure manually—just let it sit until the pressure gauge reads zero.
  8. Remove the Jars: Once it’s safe, carefully open the lid and take out your jars using gloves or tongs. Let them cool completely before inoculating them with cordyceps culture.

And that’s it! Your jars are now sterilized and ready for the next step. It’s all about staying clean and taking your time—don’t rush it, and you’ll be good to go.

How To Inoculate Jars with Cordyceps Culture?

Inoculating your jars is the part where you introduce the cordyceps culture to the sterilized rice. This is where the growing starts, so keeping everything as clean as possible is key. Here’s how to do it step by step:

  1. Get Everything Ready: Set up a clean workspace. Wipe down your area with 70% isopropyl alcohol, and make sure you’re wearing gloves and possibly a face mask to avoid contamination.
  2. Prepare Your Tools: You’ll need a sterilized syringe or inoculation loop, depending on the type of culture you’re using (liquid or agar). Make sure it’s clean and ready to go.
  3. Cool Down Your Jars: If you’ve just sterilized your jars, make sure they’re completely cool before inoculating. Heat can kill the culture, so don’t rush this step.
  4. Inject the Culture:
    • For Liquid Culture: Shake the syringe gently to mix the culture. Insert the needle through the poly-fill or micropore tape in the lid, and inject about 1–2 ml of liquid culture into different spots on the rice.
    • For Agar Culture: Use a sterilized inoculation loop or scalpel to scoop out small pieces of agar, then place them on top of the rice through the jar opening.
  5. Seal the Jars: Close the lids tightly, but ensure the poly-fill or tape is intact for airflow. Double-check that everything is secure.
  6. Label the Jars: Write the date and type of culture on each jar so you can track your progress.
  7. Store for Incubation: Place the jars in a warm, dark spot (around 20–22°C or 68–72°F). This is the incubation phase, where the culture will colonize the rice.

Now, it’s all about waiting and watching the culture grow. Keep an eye on your jars for the next few weeks, and make sure there’s no contamination sneaking in. If you’ve done it right, the rice will turn orange as the cordyceps mycelium takes over.

How To Harvest Cordyceps Grown in Jars?

Harvesting is the fun and last part. Here’s how to do it:

  1. When They’re Ready: Look for the orange stalks (the fruiting bodies) to hit about 3–4 inches tall. If they’ve stopped growing, they’re good to go. This is usually 4–6 weeks after you inoculated the jars.
  2. Clean Your Tools: Grab some scissors or a knife and sanitize them with alcohol. Same with your hands—keep everything clean to avoid ruining your harvest.
  3. Open the Jars: Take the lids off gently. Don’t shake the jars or mess with the rice inside.
  4. Cut the Stalks: Snip the cordyceps at the base, close to the rice, but don’t dig into the substrate. Be gentle.
  5. Dry Them Out: Lay the stalks on a clean surface or use a food dehydrator at 95–100°F (35–38°C) until they’re crispy. No dehydrator? A warm, dry room works, too—it just takes longer.
  6. Store Your Harvest: Once dry, stash them in an airtight container and keep them in a cool, dark spot. This keeps them fresh and ready for whenever you need them.

Harvesting is easy once you know what to look for, and nothing beats the satisfaction of seeing your cordyceps ready to use. Now, let’s get to the other method.

Bin Tech Method

Bin tech method for cordyceps

How To Prepare the Nutrient Broth for Bin Tech?

The broth for bin tech is pretty much the same as for jars, but you’ll need a lot more of it since bins hold way more rice. Here’s how to do it:

  1. Mix the Ingredients: Same recipe: coconut water, tapioca starch, magnesium sulfate, multivitamins, nutritional yeast (or soy peptone), kelp powder, and gypsum. Throw it all in a big bowl and stir until everything’s dissolved.
  2. Make Enough Broth: Since bins use more rice, just scale up the recipe. If you’re filling a big bin, you’ll probably need double or triple the amount.
  3. Store Extra: If you make too much, just toss the leftovers in the fridge. It’ll stay good for about a week, so you can use it later.

How To Hydrate the Brown Rice for Bin Tech?

Hydrating rice for bins is the same idea as for jars, just on a bigger scale. Here’s how to do it:

  1. Measure the Rice: Pour enough rice into the bin to make a layer that’s 2–3 inches deep. Don’t overdo it—leave room for the mushrooms to grow.
  2. Add the Broth: Slowly pour the nutrient broth over the rice. Use enough to get everything damp but not soaking wet—no puddles at the bottom.
  3. Mix It Up: Stir the rice around with a clean spoon or your hands (wear gloves!) to make sure the broth is evenly spread.
  4. Flatten It Out: Spread the rice into an even layer. This makes it easier for the mushrooms to colonize everything evenly.
  5. Cover It Up: Put the lid on the bin, but make sure there’s some airflow. If your lid is solid, poke a few holes or cover the top with breathable plastic wrap.

How To Sterilize Bins for Cordyceps Cultivation?

Sterilizing bins is slightly different from jars, but it’s just as easy when you have a rice cooker or Instant Pot. Here’s how to do it step by step:

  1. Clean Everything First: Wash the bin and lid with hot, soapy water. Rinse it well and dry it completely.
  2. Prep the Rice and Broth: Mix your rice and nutrient broth in the bin like we talked about earlier. Spread it out evenly across the bottom.
  3. Get Your Rice Cooker or Instant Pot Ready: Add a small amount of water to the cooker, just enough to create steam. Place a heat-safe trivet or a small rack inside to keep the bin from sitting directly in the water.
  4. Sterilize the Bin:
    • Rice Cooker: Put the bin in the cooker, cover it (loosely, not airtight), and run the cooker for about 2–3 hours.
    • Instant Pot: Place the bin inside, seal the pot, and use the steam setting for about 1.5 hours.
  5. Cool It Down: After sterilizing, carefully remove the bin and let it cool to room temperature before inoculating. Heat will kill the culture, so don’t rush this step.

How To Inoculate Bins with Cordyceps Culture?

Once your bin is sterilized and cooled, it’s time to add the cordyceps culture. Here’s how to do it:

  1. Set Up a Clean Workspace: Wipe down your area with 70% isopropyl alcohol. Wear gloves and sanitize them too.
  2. Choose Your Culture: You can use liquid culture or agar culture. Make sure your syringe or inoculation loop is clean and ready.
  3. Spread the Culture:
    • For Liquid Culture: Inject the culture directly into multiple spots on the rice layer. Use about 1–2 ml per spot and spread it evenly across the bin.
    • For Agar Culture: Scoop small pieces of agar with a sterile tool and place them evenly on top of the rice layer.
  4. Seal the Bin: Put the lid on but don’t make it airtight—cordyceps need airflow. If the lid doesn’t have vents, poke a few small holes and cover them with breathable tape like micropore tape.
  5. Label and Store: Write the date and type of culture on the bin. Store it in a warm, dark spot (around 20–22°C or 68–72°F) for incubation.

Now it’s time to sit back and let the cordyceps do their thing. You’ll see the orange mycelium spreading across the rice in just a few weeks.

What Are the Best Conditions for Incubating Bins?

To get your cordyceps growing right, you need to nail the setup. Keep the temperature around 20–22°C (68–72°F)—don’t let it get too cold or too warm. The bins usually stay humid, but if things look dry, give the rice a light mist with clean water.

They don’t need pitch darkness but avoid bright light or direct sunlight. A dim corner or soft, indirect light works fine. Find a quiet spot where they can chill without getting bumped or moved too much.

How To Harvest Cordyceps Grown in Bins?

Once your cordyceps are fully grown, it’s time to harvest them. They’ll be about 3–4 inches tall and bright orange when they’re ready, usually after 4–6 weeks. Here’s what you do:

  1. Grab Some Scissors or a Knife: Clean them with alcohol so you don’t introduce any nasties.
  2. Carefully Open the Bin: Take off the lid without disturbing the rice.
  3. Snip the Stalks: Cut the mushrooms close to the base, but don’t pull up chunks of rice.
  4. Dry Them Out: Use a dehydrator at 95–100°F (35–38°C) until they’re crisp. If you don’t have one, spread them out in a warm, dry spot, but it’ll take longer.
  5. Store Them Right: Once dry, stash them in an airtight container somewhere cool and dark. This keeps them fresh for when you’re ready to use them.

It’s super easy. Be gentle when handling the bins, and you’ll have a solid harvest of cordyceps ready.

How Can You Eat or Take Cordyceps Mushrooms?

A plate full of Cordyceps

You can make tea, take capsules, or throw them into your cooking recipes. Whether fresh or dried, they’re great for boosting energy, helping your immune system, and just making you feel better overall.

Fresh vs. Dried Cordyceps

  • Fresh Cordyceps: These are perfect if you’ve just harvested them. Use them in soups, teas, or stir-fries. They’ve got a mild flavor that blends nicely with savory dishes, but they won’t last long—use them within a few days.
  • Dried Cordyceps: These last forever (almost). Use them to make tea, grind them into powder, or toss them into any recipe. They’re just as potent as the fresh ones but way easier to store.

Making Tea, Capsules, or Cooking with Cordyceps

Tea

Steep 5–7 dried cordyceps mushrooms in hot water for 15–20 minutes. Add honey or lemon if you want a little extra flavor. It’s simple, relaxing, and great for a quick energy boost.

Capsules

Grind your dried cordyceps into powder and fill capsules with about 500 mg each. Take one or two a day. Capsules are great if you don’t want to mess with tea or cooking.

Cooking

  • What to Cook With: Cordyceps go great with soups, broths, rice, or stir-fries. They pair well with chicken, veggies, or even noodles.
  • How to Use Them: If you’re using dried ones, soak them in warm water for 10 minutes to soften them up. Then add them to your dish like any other ingredient.

Cordyceps mushrooms aren’t complicated—tea for something quick, capsules for no fuss, or cooking if you’re feeling fancy. Whatever you pick, you’re getting some solid health benefits while keeping it super easy.

Are Cordyceps Mushrooms Easy for Beginners to Grow?

Hands full of cordyceps

Cordyceps are the best mushrooms if you’re new to growing. If you can keep things clean and follow some basic steps, you’ll be fine. They don’t need sunlight or a fancy setup, but you’ll have to be precise about temperature and humidity.

Challenges You Might Face

  • Keeping it Clean: Contamination is a pain. Even a little mold can ruin everything.
  • Getting Conditions Right: They’re picky about temperature and humidity, so you’ll need to check on that a lot.
  • Finding the Right Supplies: Good-quality spores and clean equipment are a must.

Tips for First-Time Growers

  • Start Small: Go with the jar method—it’s simple and doesn’t need a lot of space.
  • Be Extra Clean: Sterilize everything, like your jars and tools, and wash your hands before touching anything.
  • Track Conditions: A cheap thermometer and hygrometer can save you a lot of guessing.
  • Follow a Guide: Don’t wing it. Stick to a clear step-by-step process.
  • Take Your Time: Growing takes patience, so don’t rush or panic if things look slow.

Conclusion

Cordyceps are beginner-friendly if you’re willing to put in a little effort. Start small, keep it clean, and follow the steps. Once you get the hang of it, you’ll have fresh mushrooms ready for tea, capsules, or cooking. Give it a shot!

Author Microdosify

By Rachel Grey

I’m Rachel Grey, a Ph.D. psychologist specializing in psychedelic therapy with psilocybin and natural plant medicines. I obtained my doctorate from the University of Toronto, where I immersed myself in the study of these transformative therapies. With over 10 years of experience, let’s embark on transformative journeys of healing, growth, and self-discovery as we explore the power of psychedelic therapy together.

Updated on January 14, 2025
Currency

Select your location

Choose your currency to view accurate pricing.

Correct currency selected?
Close the popup to begin your journey with Microdosify.
By proceeding, you confirm that you are 19 years of age or older.

Claim your 15% OFF on your first order!

Unlock exclusive offers, expert insights, and webinars.

Join our Free integration circles hosted live every week.